How to Activate Your Windows Server 2019
Navigate to your account area on our site. Move your cursor to Profile (without selecting) to reveal a dropdown menu. Choose Product Keys.
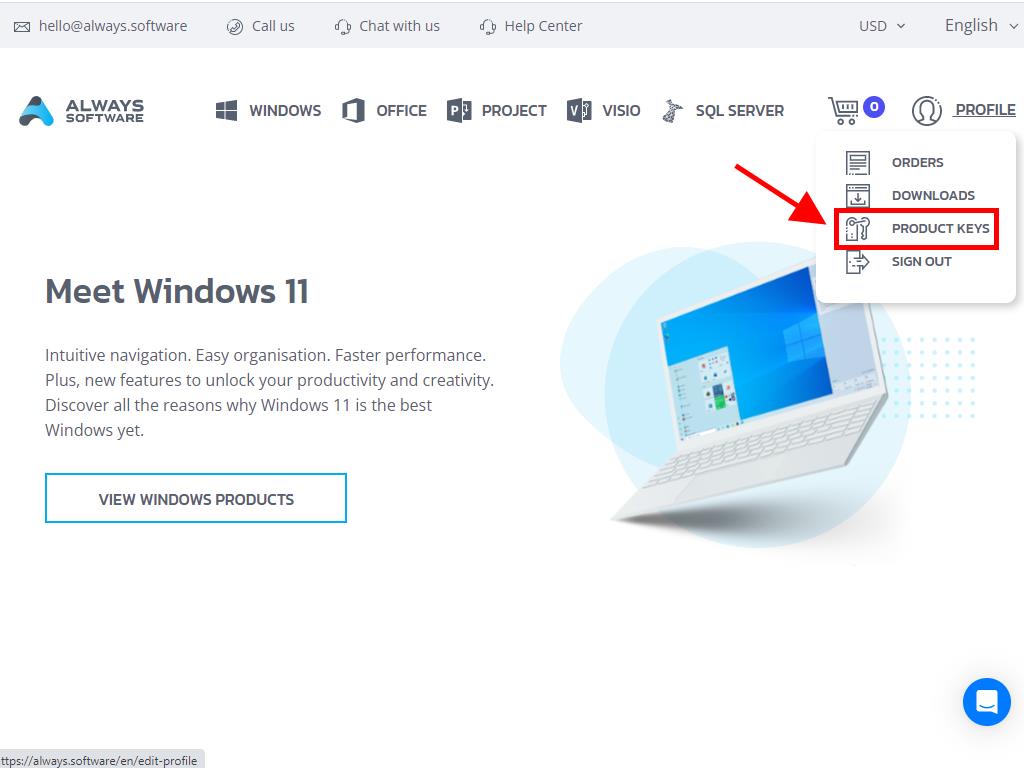
This section contains the product key required for activating Windows Server 2019.
If activating an already installed version of Windows Server, ensure it's beyond the evaluation stage, then:
Important: Ensure all software updates are installed prior to activation.
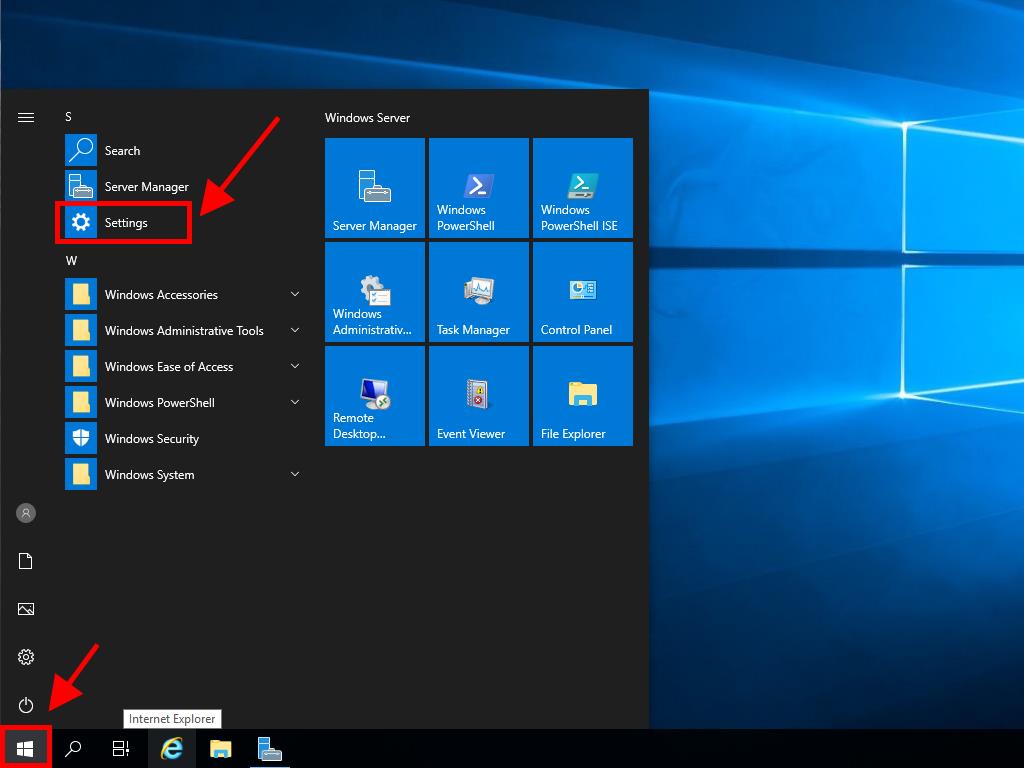
- After updating, hit the Start button and select Settings.
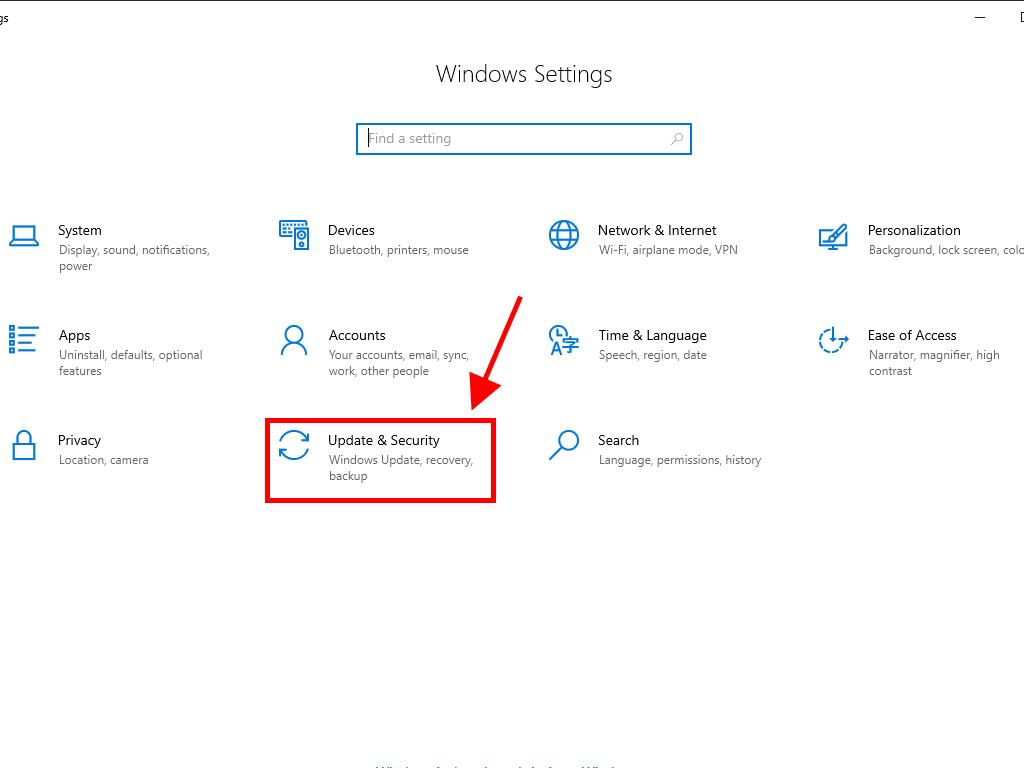
- Click Update & Security next.
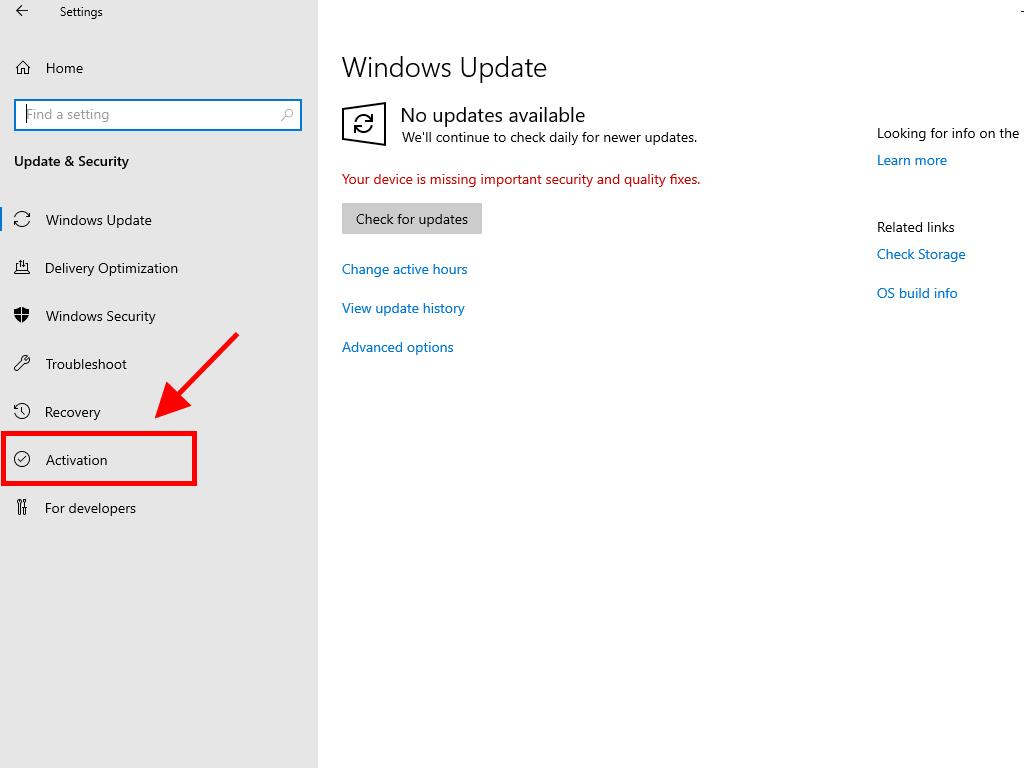
- Then select Activation.
- Proceed to Change product key.
- Insert your product key and press Next.
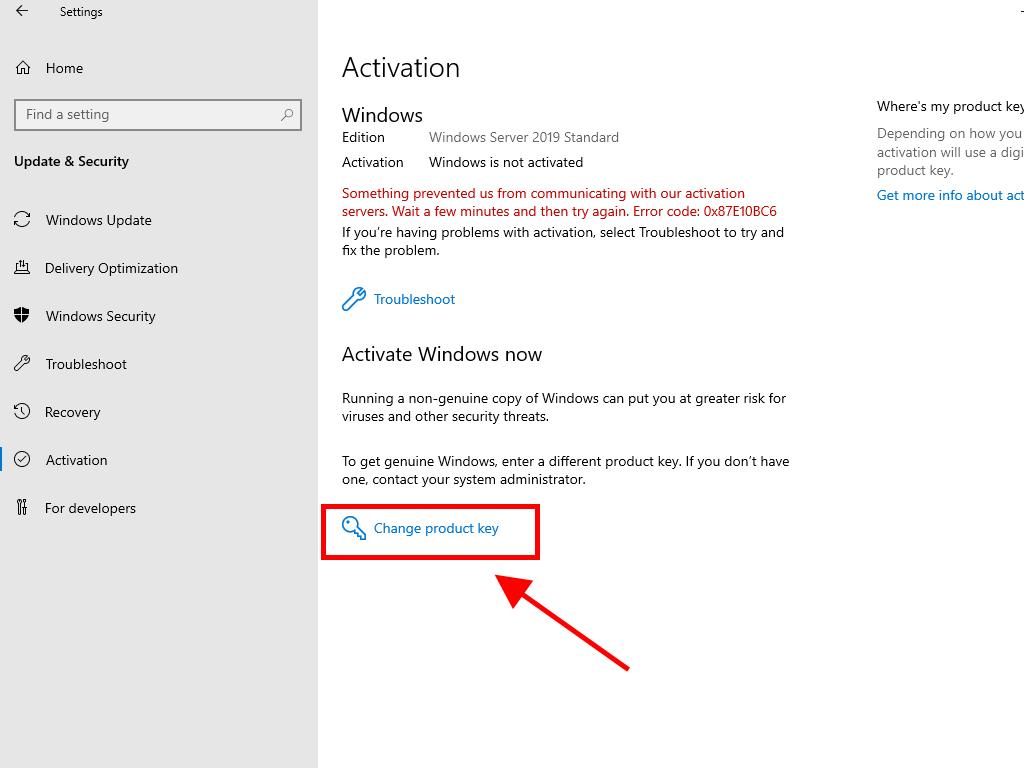
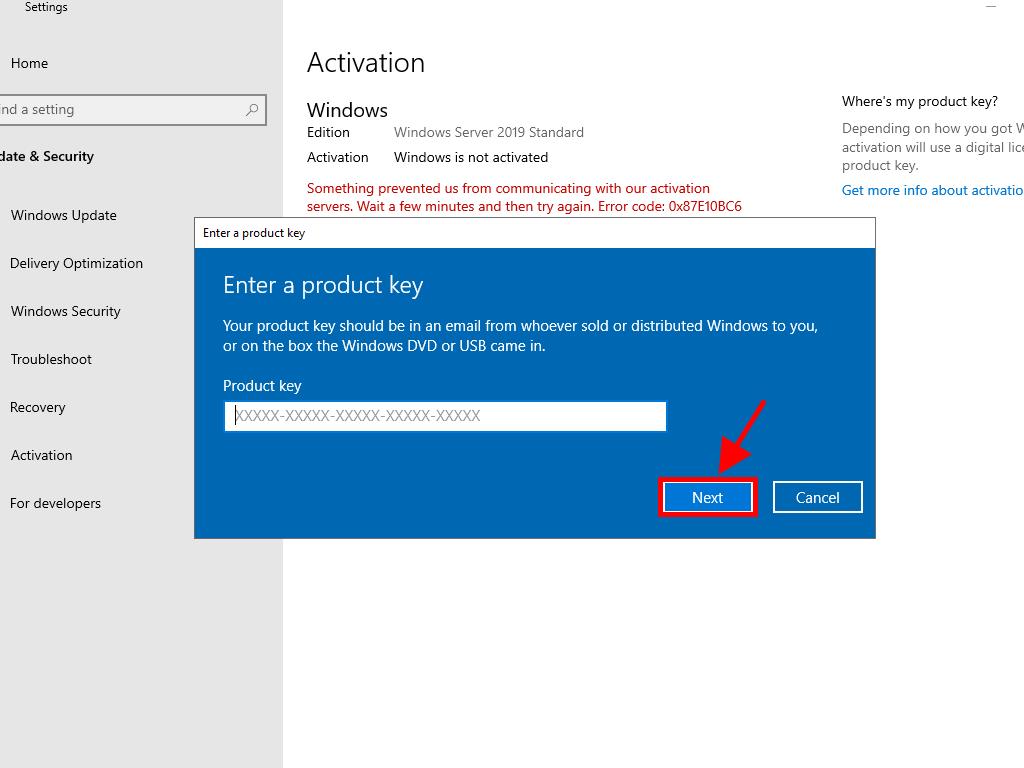
Note: Should an error occur post product key entry stating The product key you entered did not work. Check the product key and try again, or try a different one, it's possible your system is an evaluation edition or has been installed using a different activation channel than the license was intended for. We recommend contacting our support team for assistance with troubleshooting and resolving the issue. For personalized support, click here.
If your system is setup as an evaluation edition, you'll need to:
Remember: Ensure all updates are applied, or activation may fail.
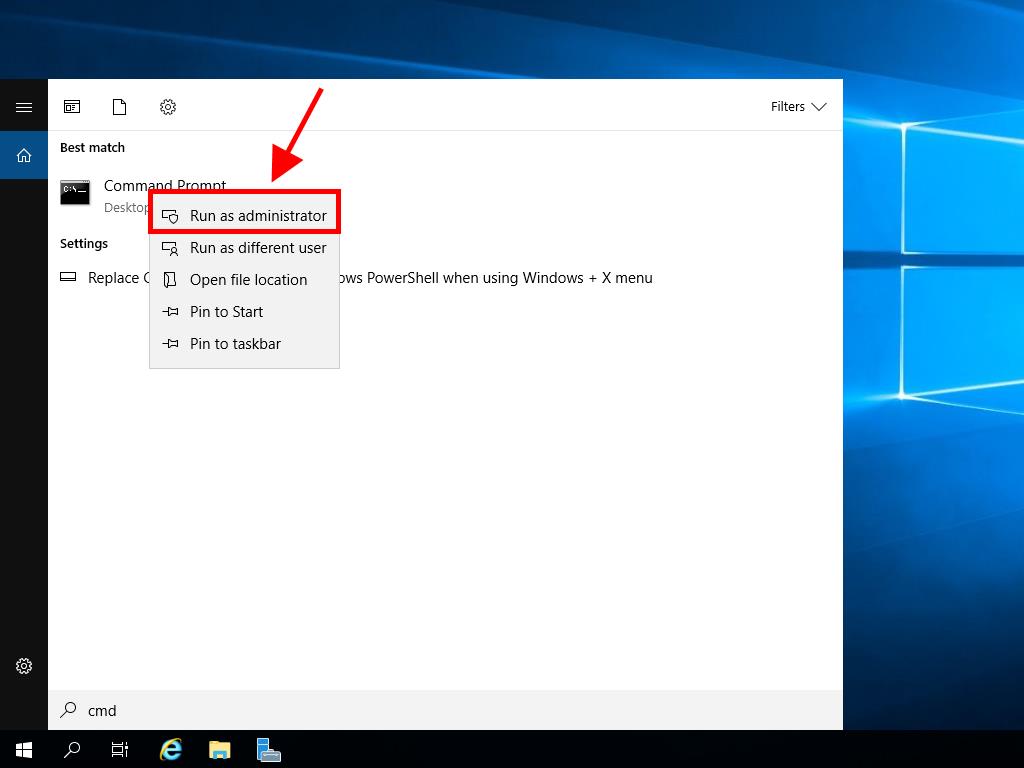
- In the taskbar's search field, enter CMD. When the Command Prompt appears, right-click and choose Run as administrator.
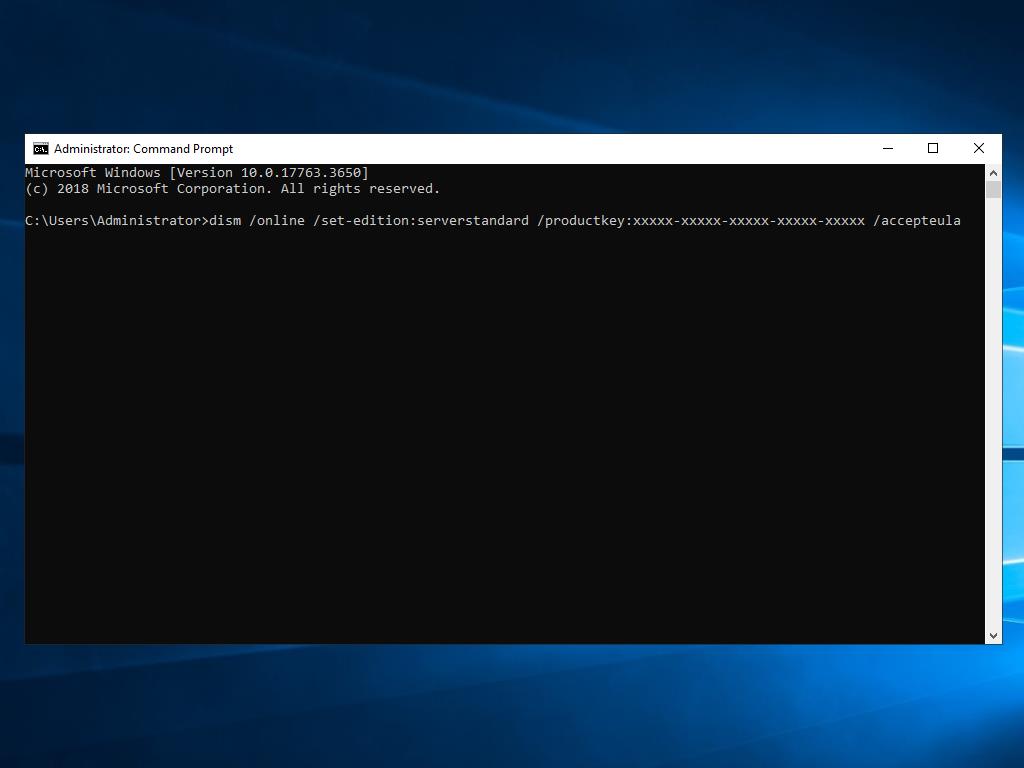
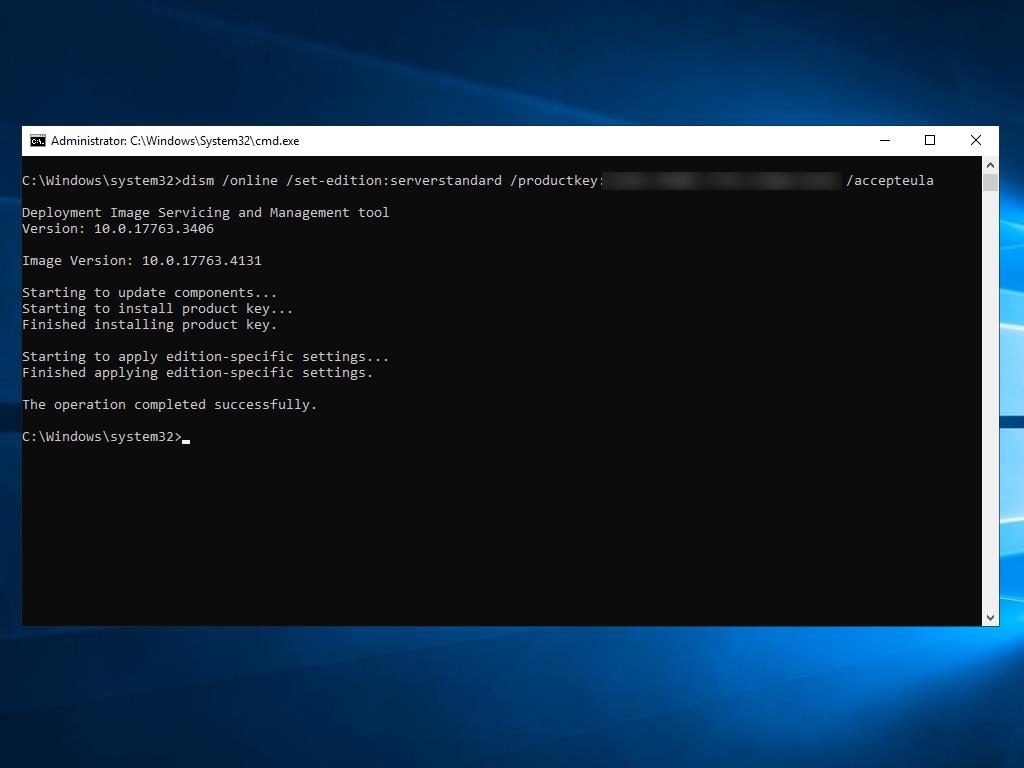
- Input the command: dism /online /set-edition:serverstandard /productkey:XXXXX-XXXXX-XXXXX-XXXXX-XXXXX /accepteula, substituting the Xs with your actual product key, then hit Enter.
- Once the activation is complete, a server reboot is necessary.
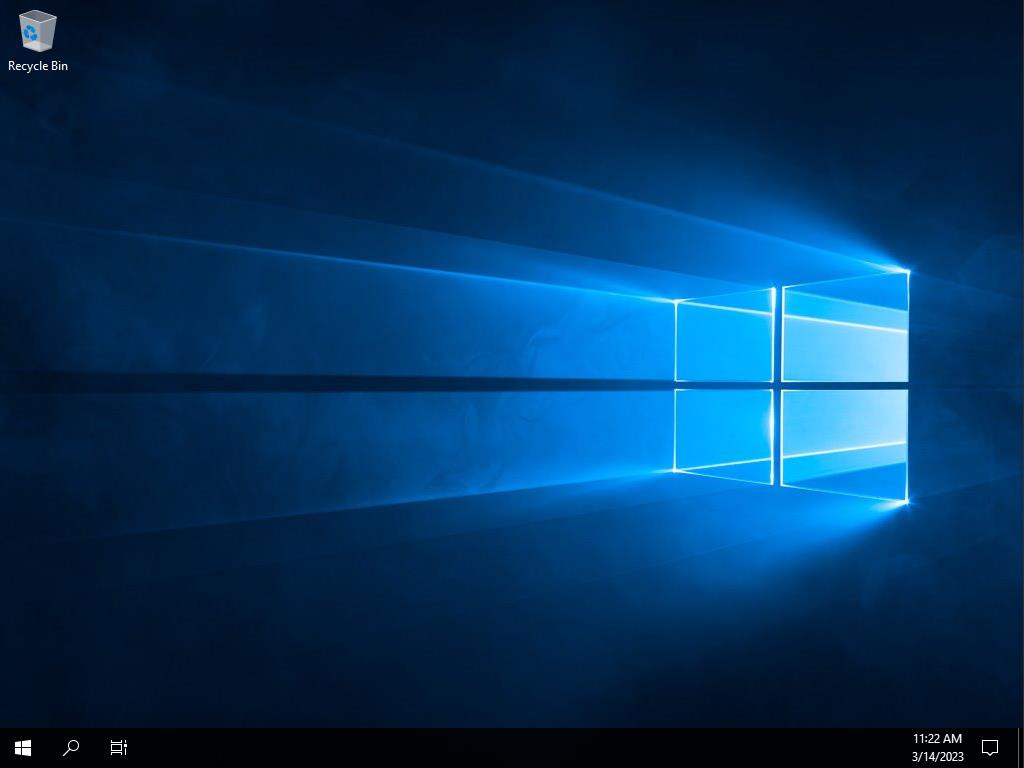
- Upon restart, your activated Windows Server 2019 will be operational, verified by the absence of the Windows Server Standard Evaluation mark in the lower right corner.
 Sign In / Sign Up
 Orders
 Product Keys
 Downloads

 Go to United States of America - English (USD)