Sign In / Sign Up
 Orders
 Product Keys
 Downloads

 Go to United States of America - English (USD)
Activating Your Windows Server 2016 Step-by-Step
Visit the account area on our site. Hover over Profile to see a dropdown menu. Choose Product Keys.
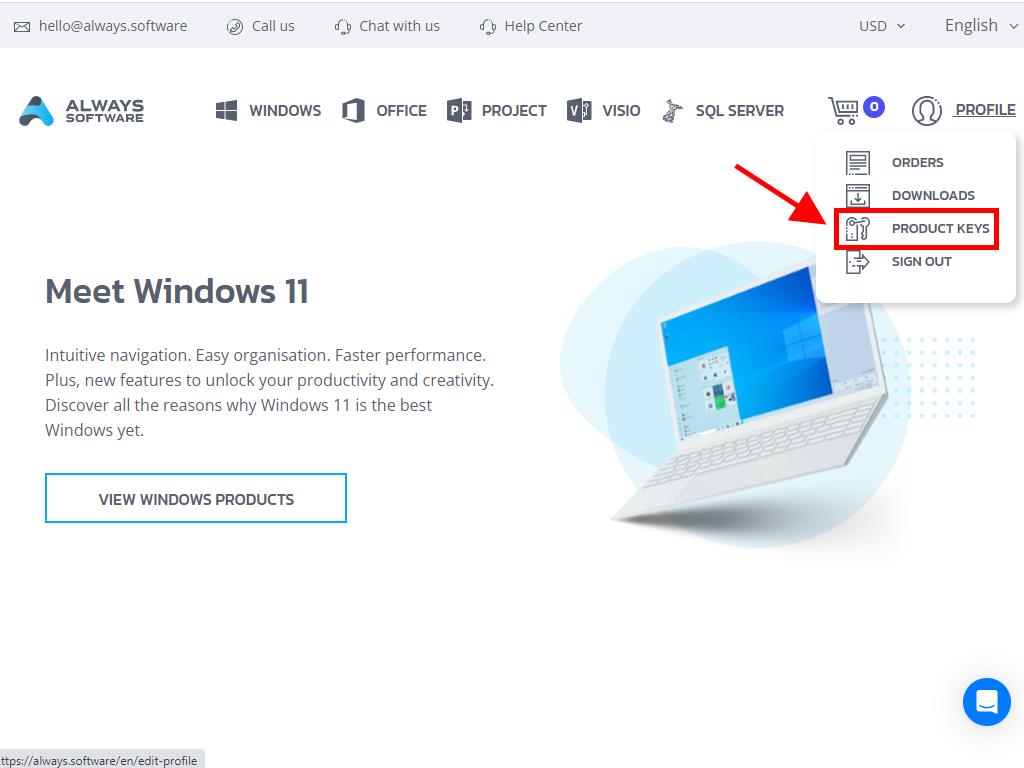
This is where you'll find the key necessary for activating Windows Server 2016.
If you're working with an already installed Windows Server, ensure it’s beyond the trial period and take the following steps:
Reminder: Before activation, ensure all system updates are applied.
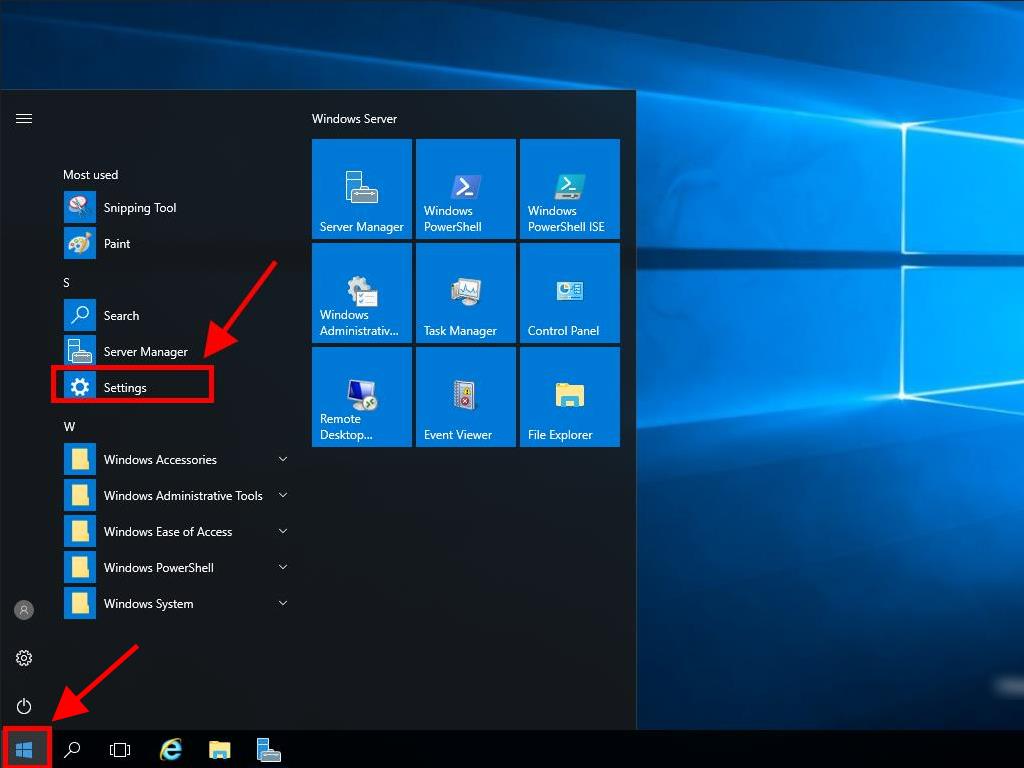
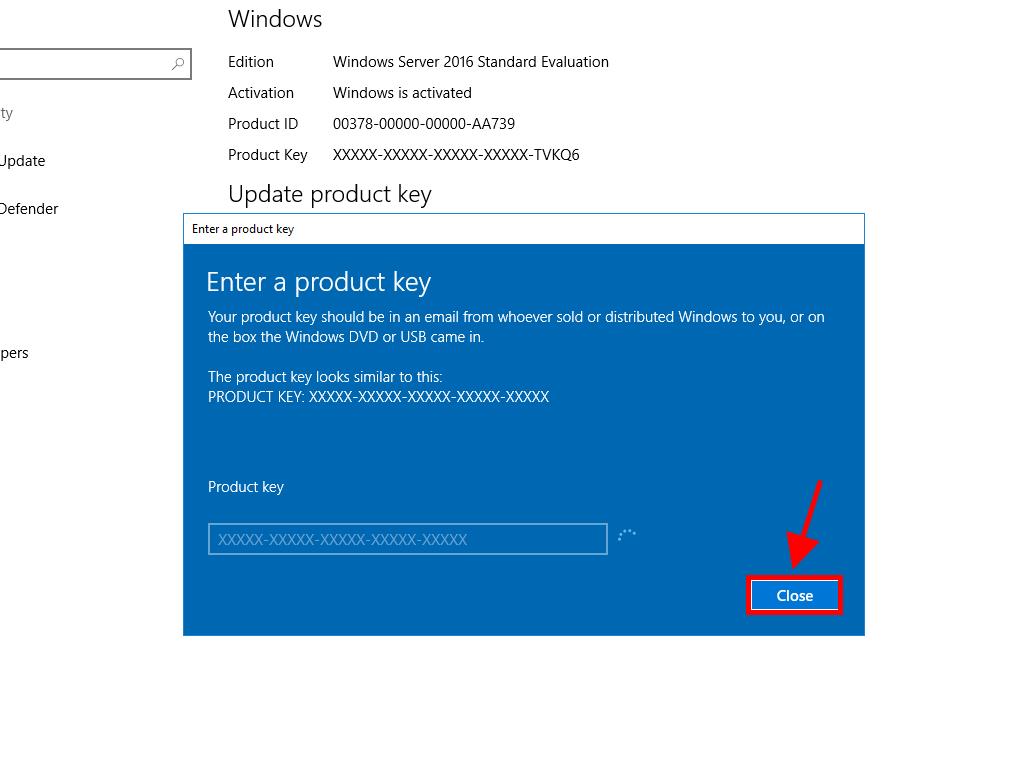
- After updating, press the Start button, then navigate to Settings.
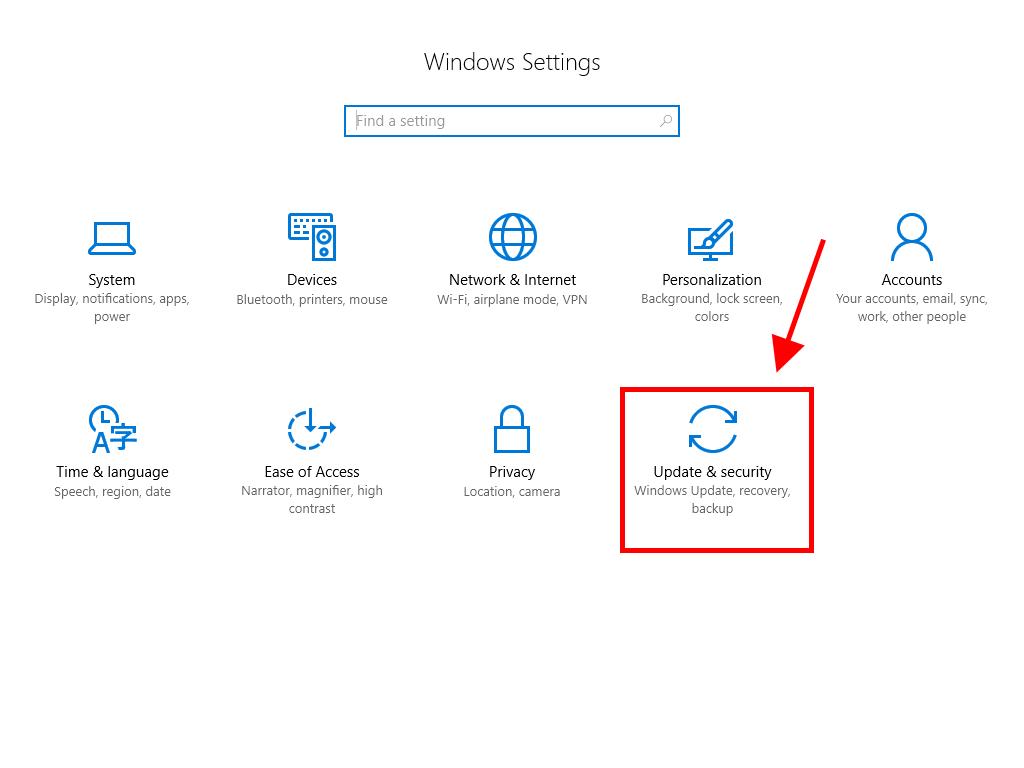
- Proceed to Update & Security.
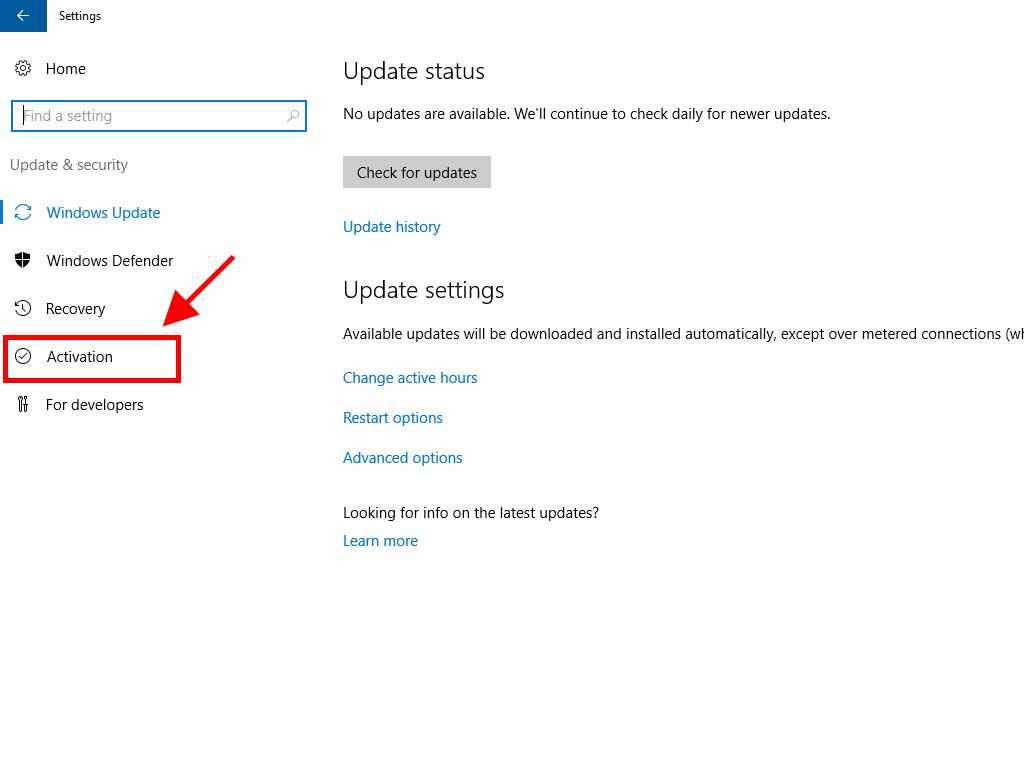
- Select Activation.
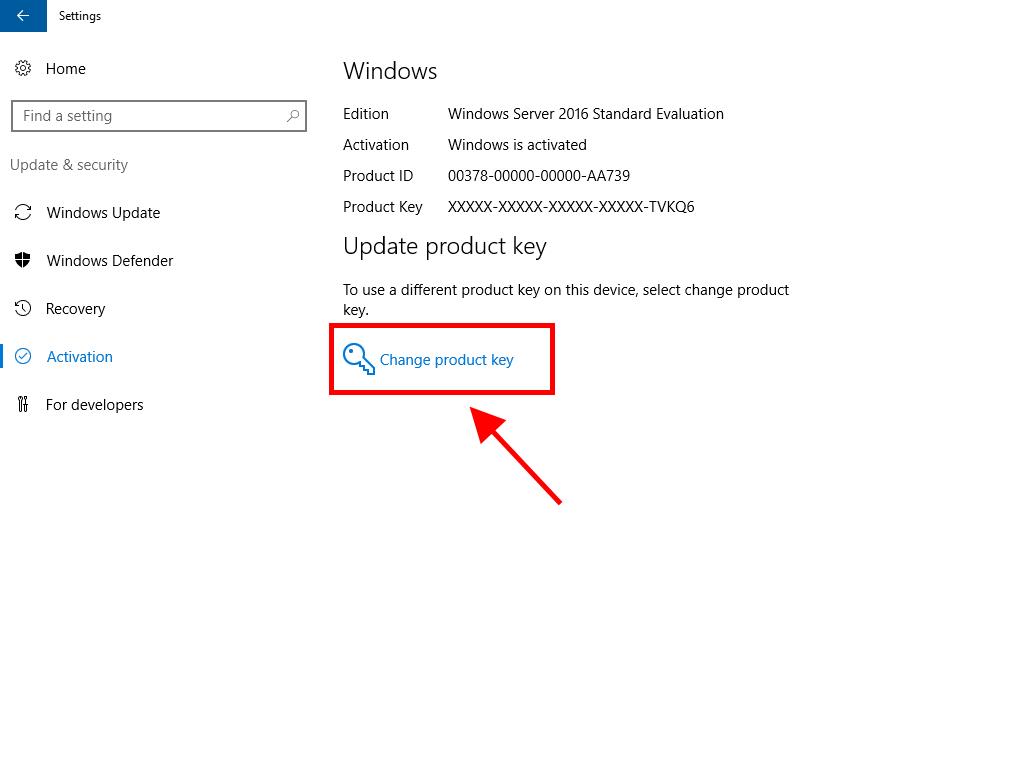
- Choose Change product key.
- Input your product key for automatic recognition and activation, then click Close.
Important: If a message stating The product key you entered didn't work. Check the product key and try again, or try a different one appears, it’s possible that your system is on an evaluation version or on a different activation channel than the license. Contact our support team for immediate assistance. For direct help, click here.
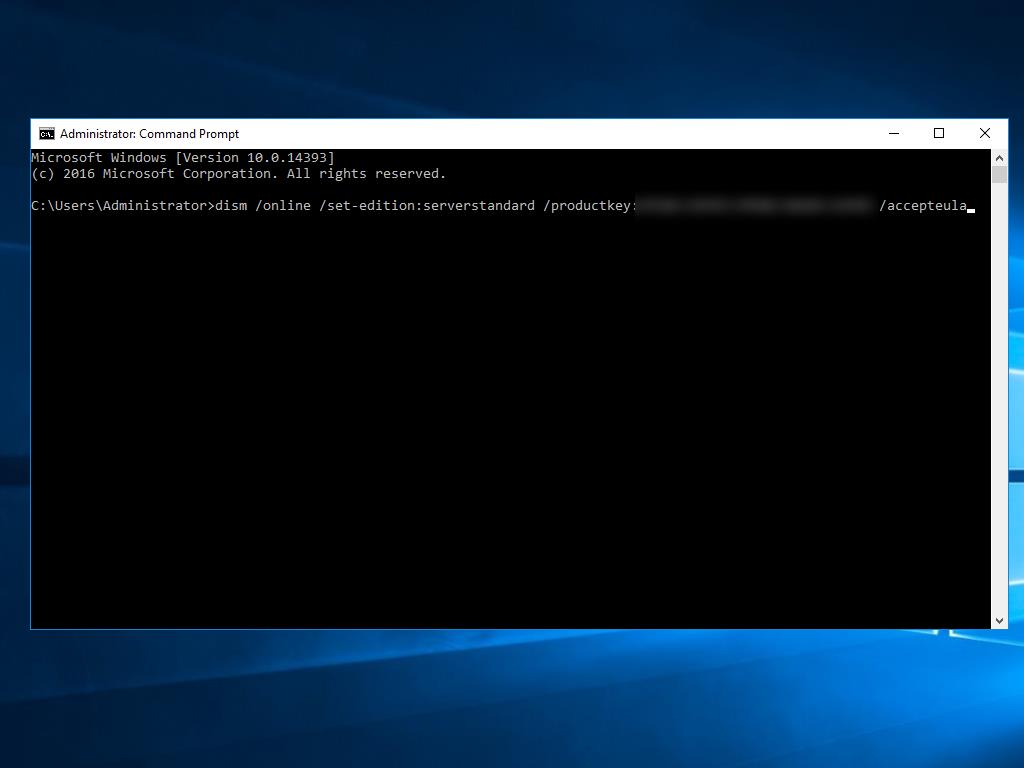
If your system is an evaluation version, you must:
Note: Ensure all updates are installed, or you may face activation issues.
- In the search box on the taskbar, type CMD. Right-click on Command Prompt and choose Run as administrator.
- Type the following command: dism /online /set-edition:serverstandard /productkey:XXXXX-XXXXX-XXXXX-XXXXX-XXXXX /accepteula. Substitute the Xs with your product key and press Enter.
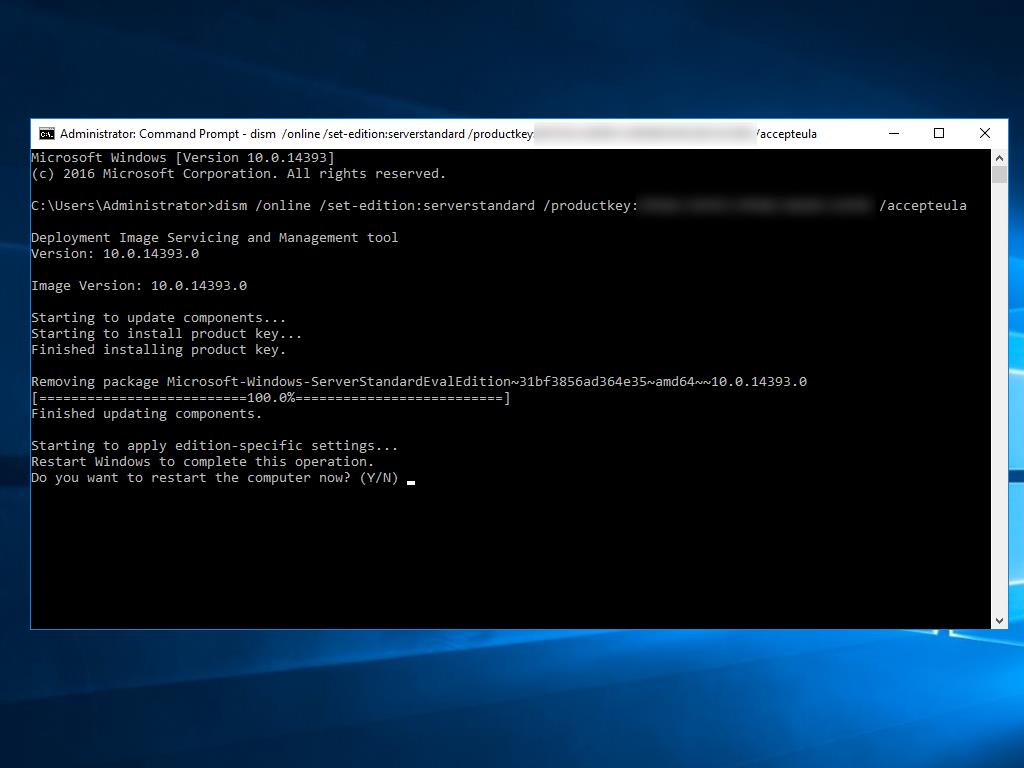
- After completing the activation, restart your server.
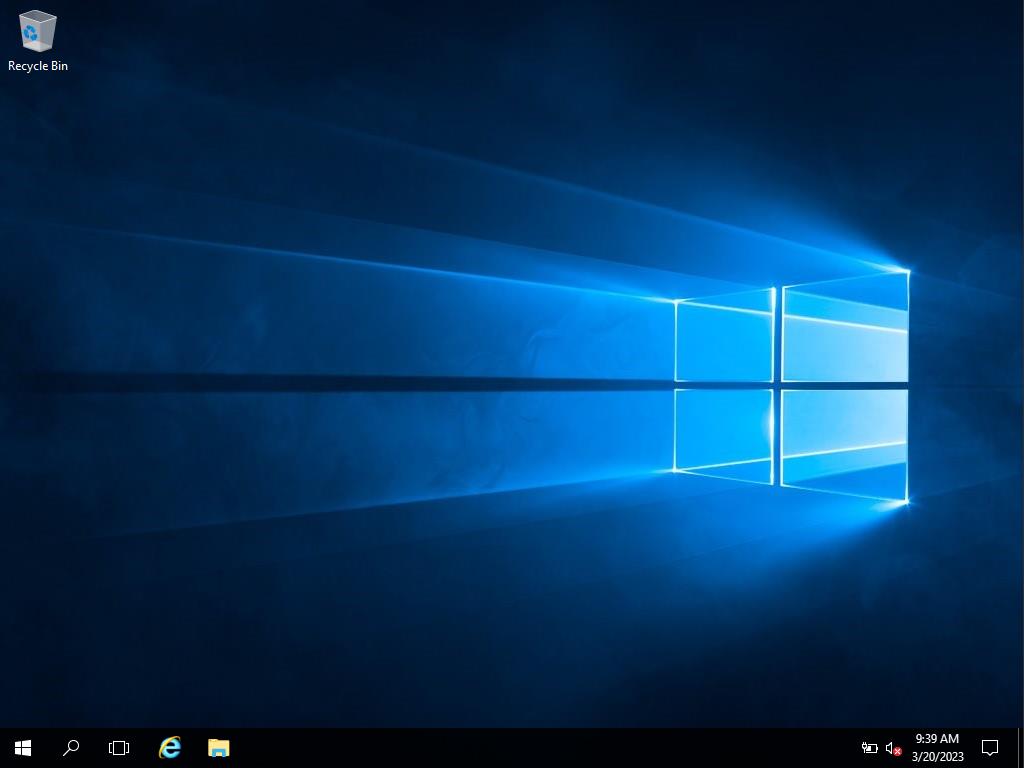
- Upon reboot, your Windows Server 2016 will be fully activated. Confirm this by noting that the Windows Server Standard Evaluation mark is no longer displayed in the bottom right corner.