Adjusting Language Settings in Windows Server 2012 R2
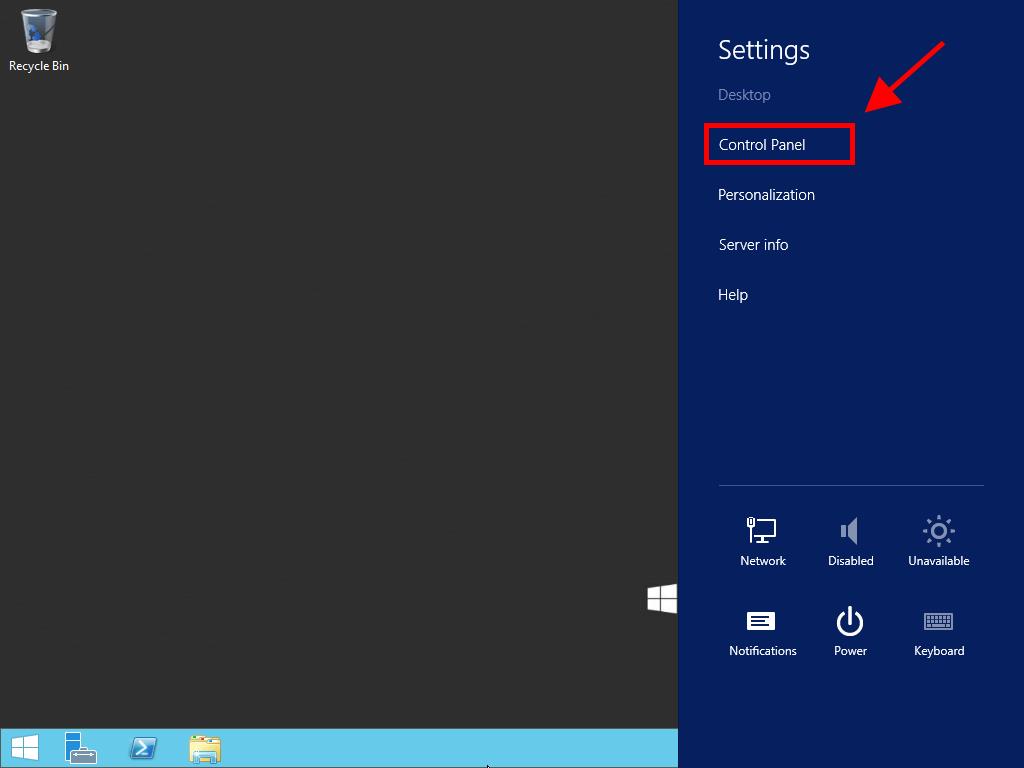
- Press the Start button, followed by selecting Control Panel.
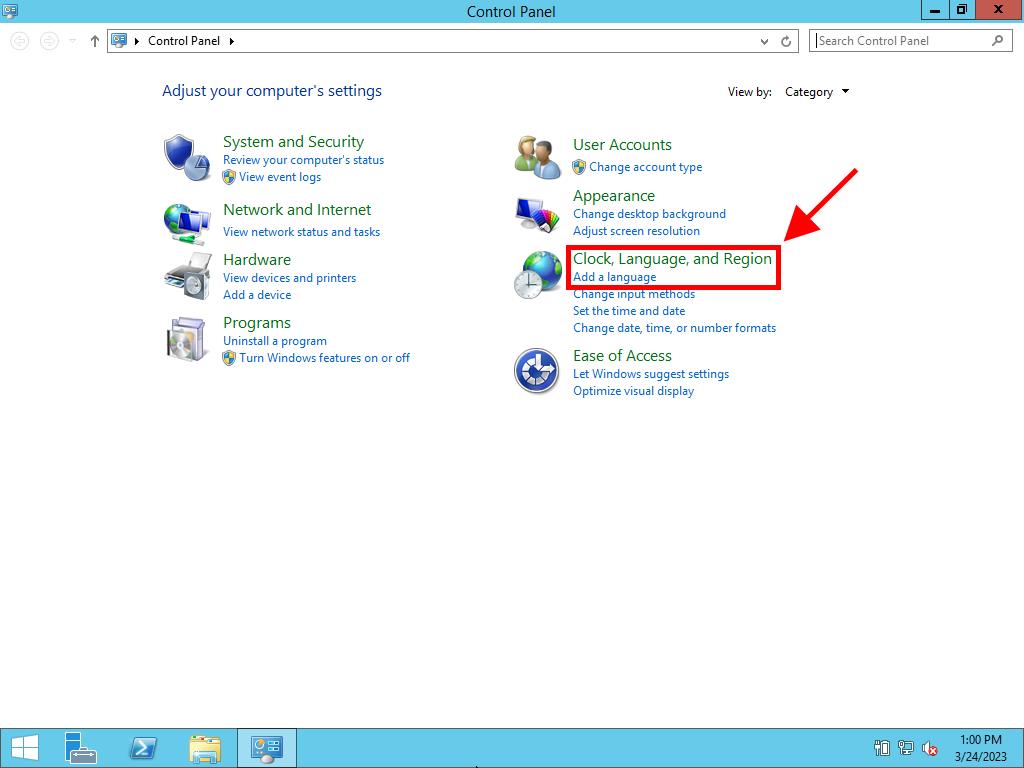
- Under the Clock, Language, and Region category, select Add a Language.
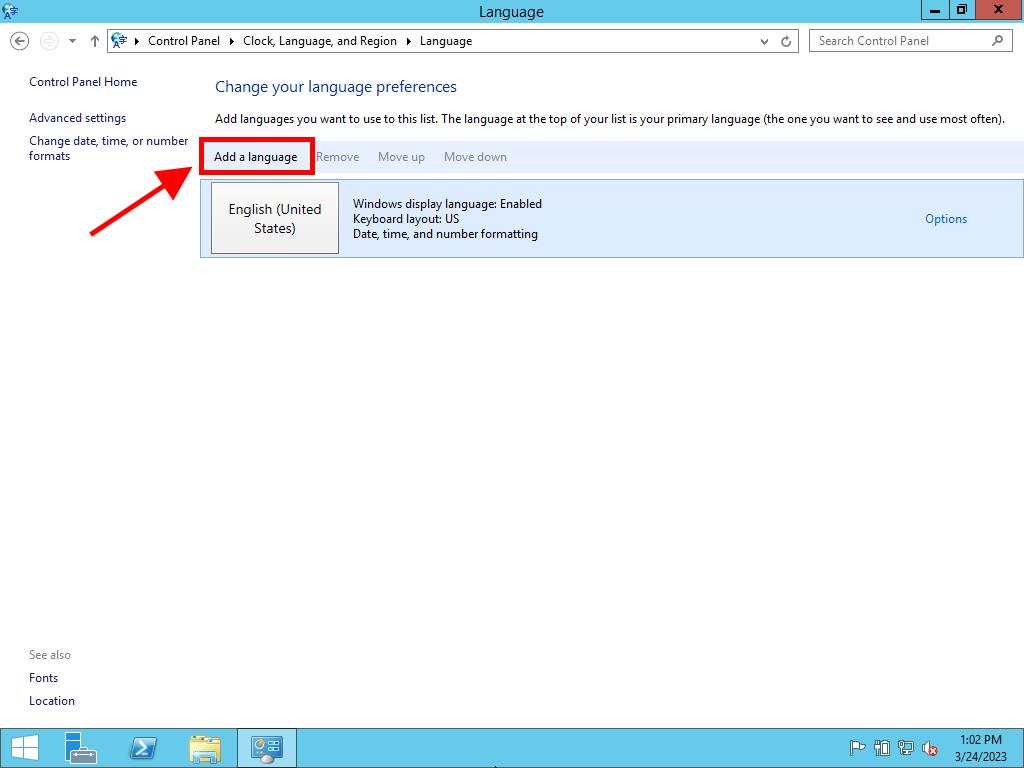
- Select Add a language to proceed.
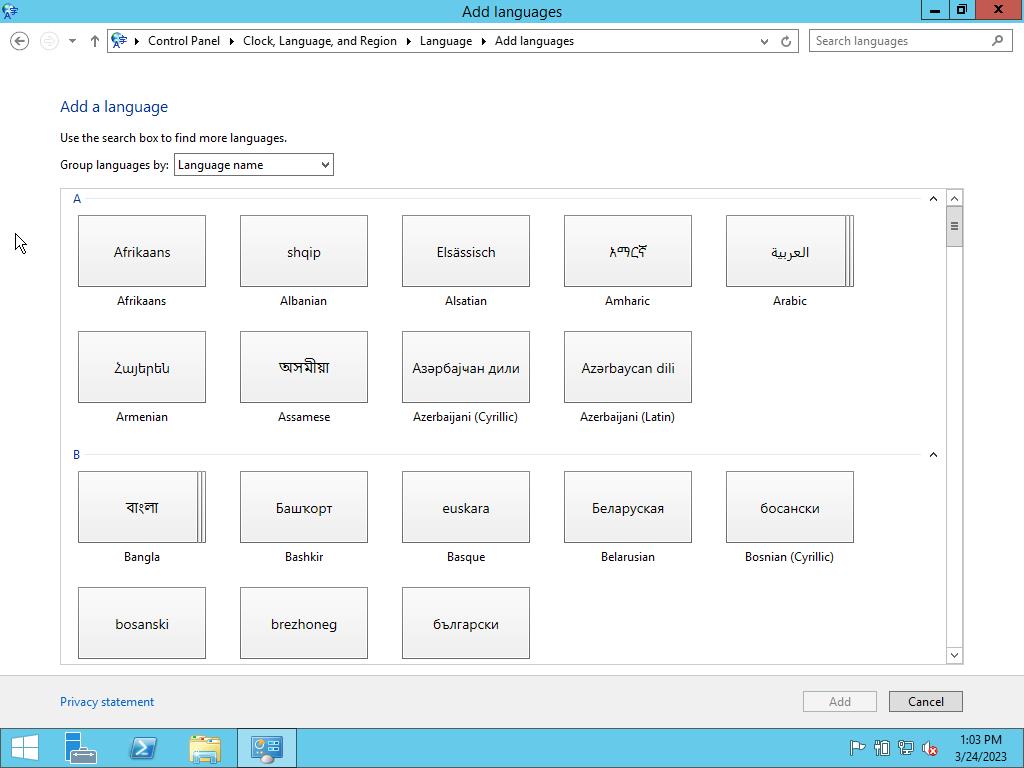
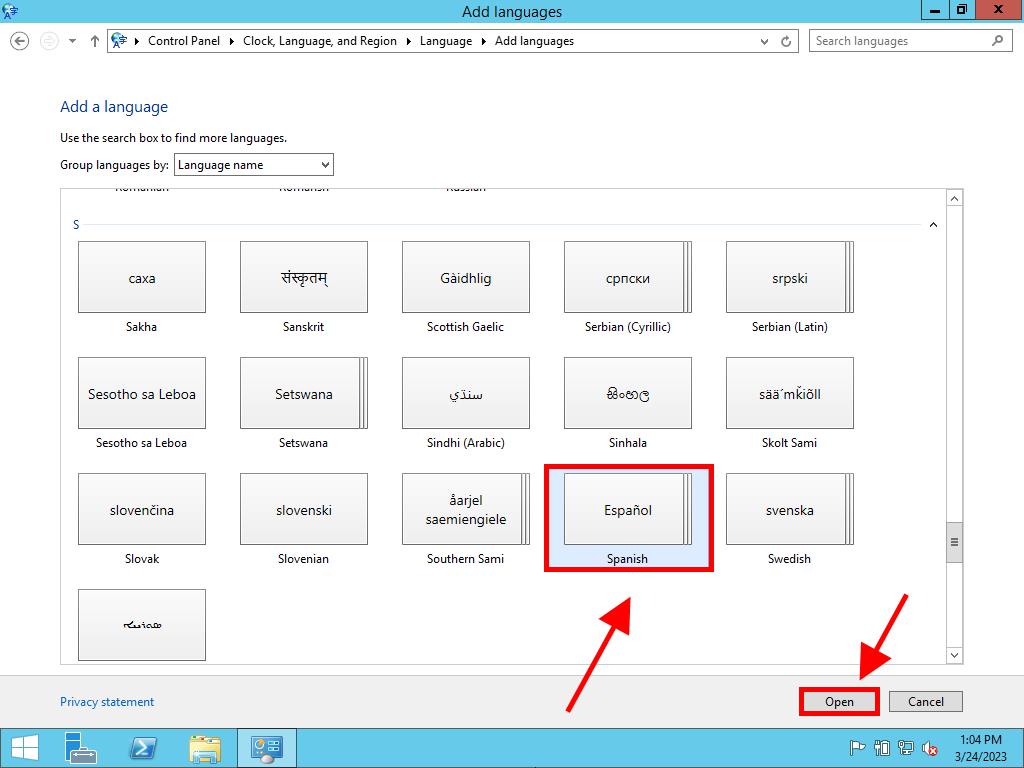
- Navigate to the end to search for your desired language.
- Identify and select the language you wish to install, and click Open.
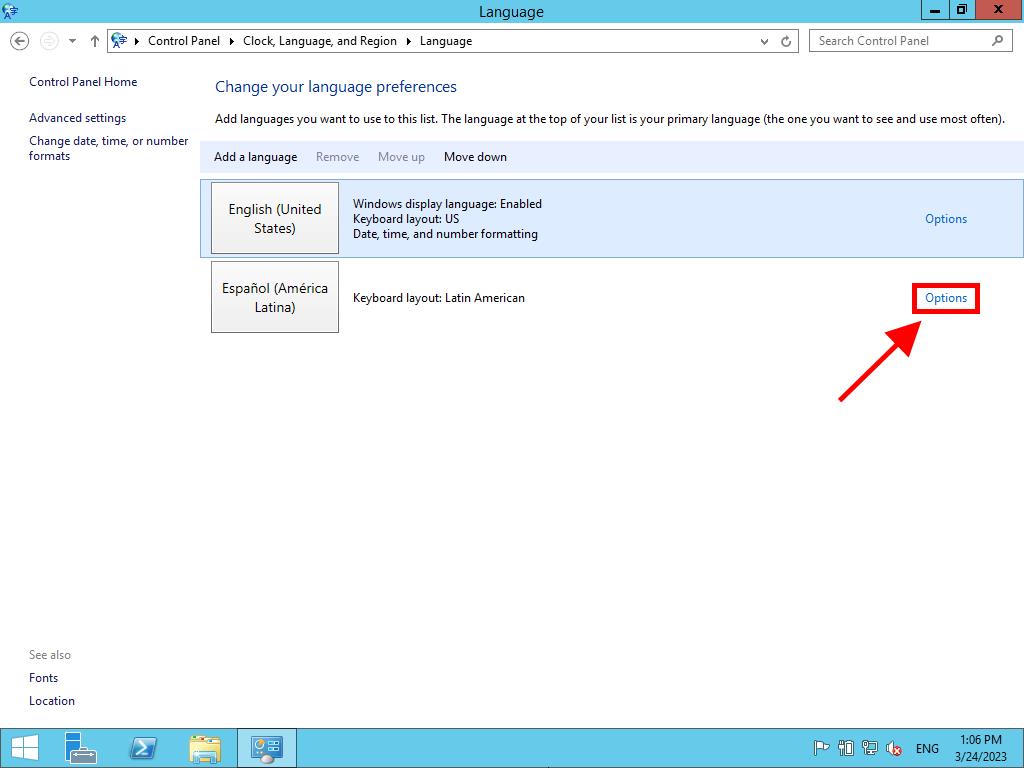
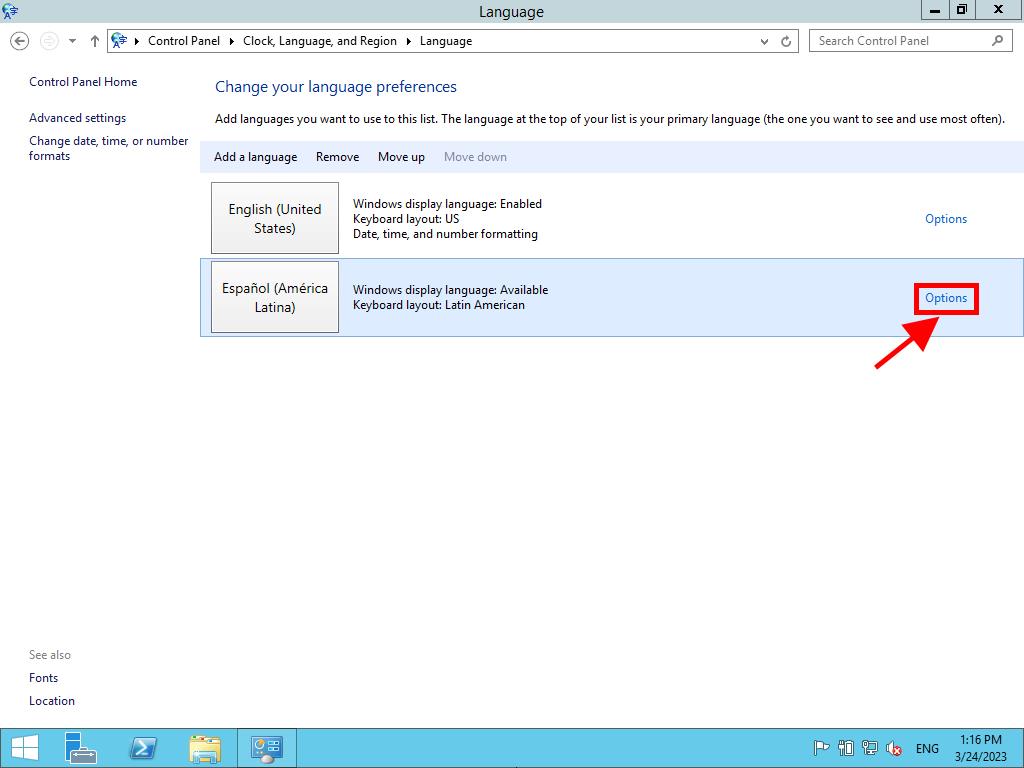
- After adding the language, select Options to the right of the language entry.
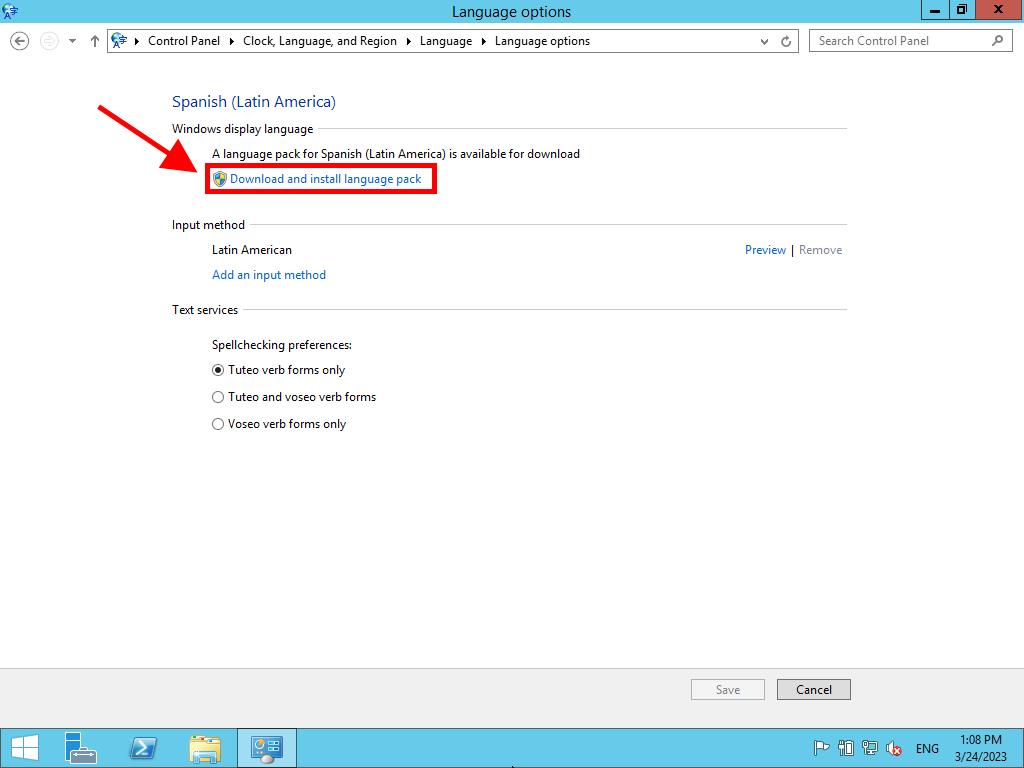
- Proceed to Download and install language pack.
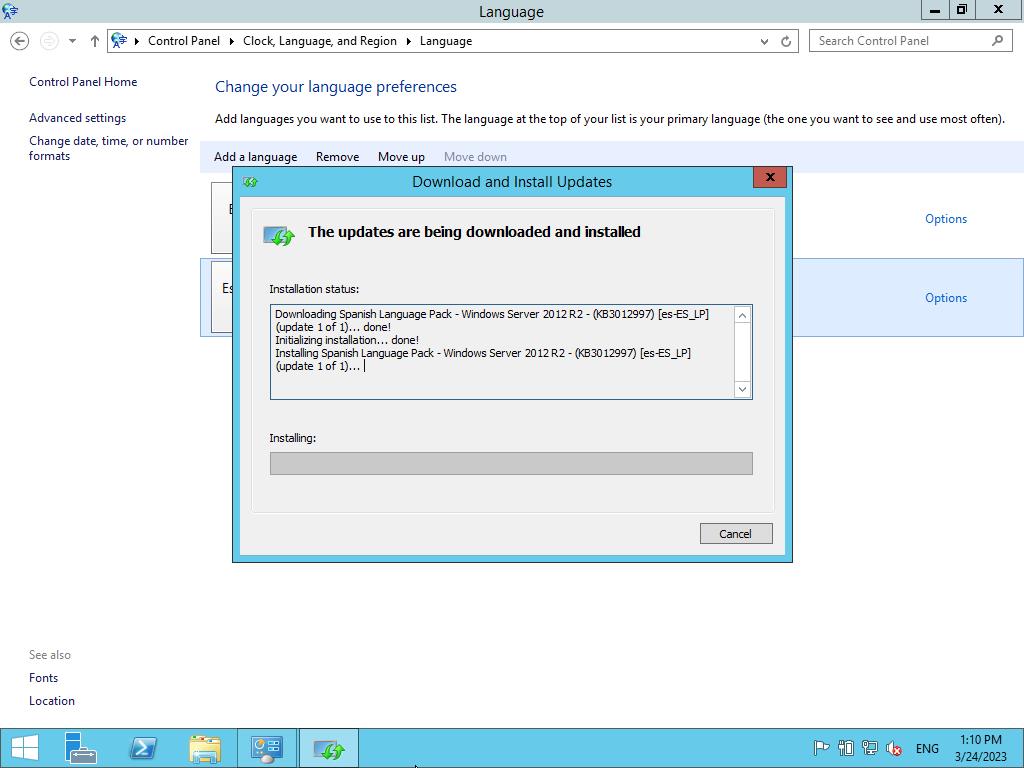
- Allow some time for the language pack to download and install.
- Revisit Options post installation.
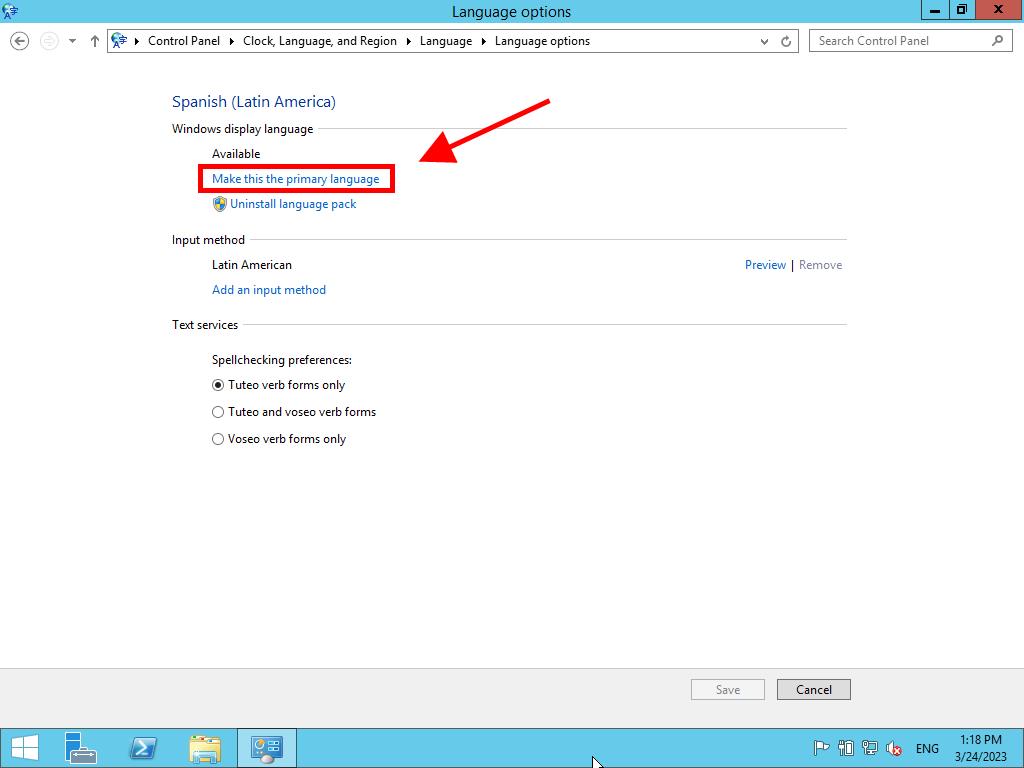
- Choose Make this the primary language.
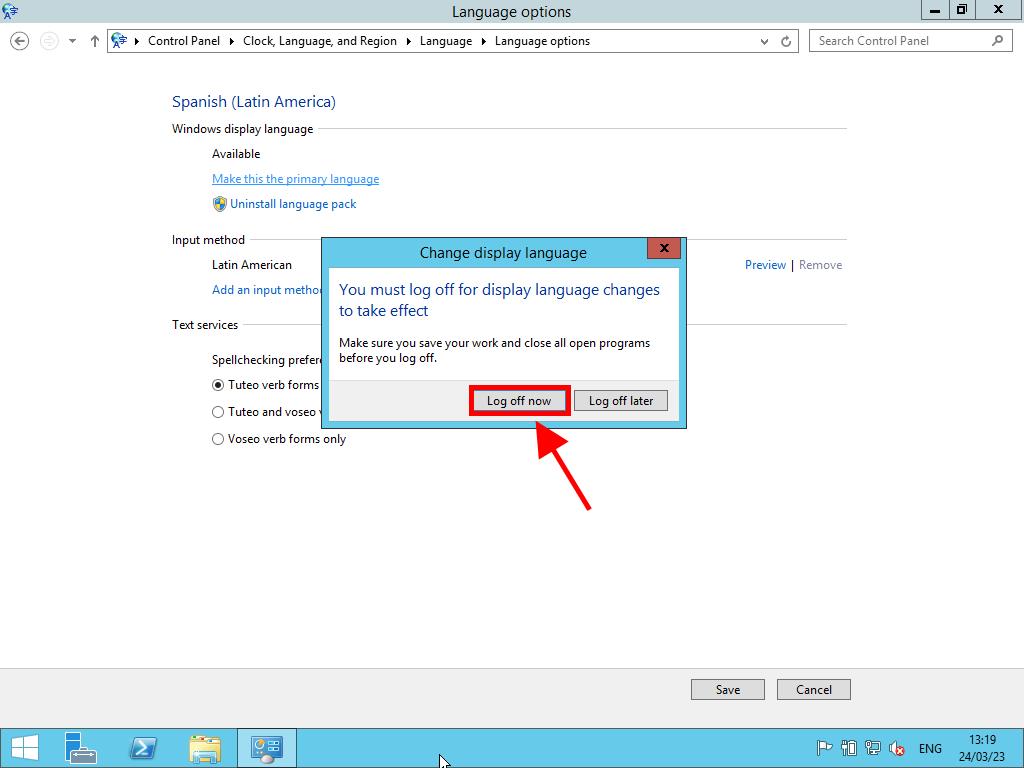
- Lastly, sign out immediately to apply the new language setting on your Windows Server 2012 R2 by clicking Sign out now.
Note: Some languages may have regional variants, so be sure to select the appropriate one and then click Add.
 Sign In / Sign Up
 Orders
 Product Keys
 Downloads

 Go to United States of America - English (USD)