Step-by-Step Guide to Installing Windows 8.1 in VirtualBox
To begin installing VirtualBox, here are the necessary steps:
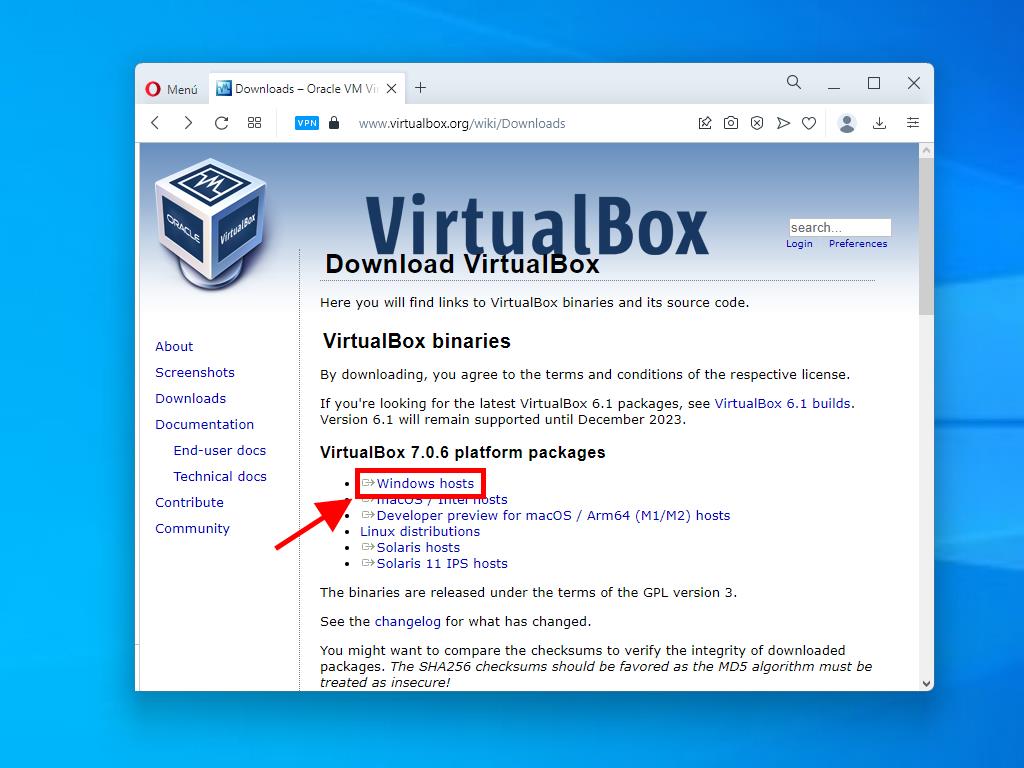
- Visit this link and choose the Windows Hosts selection.
- The download of the VirtualBox installer will commence.
- Run the downloaded VirtualBox installer and proceed by selecting Next.
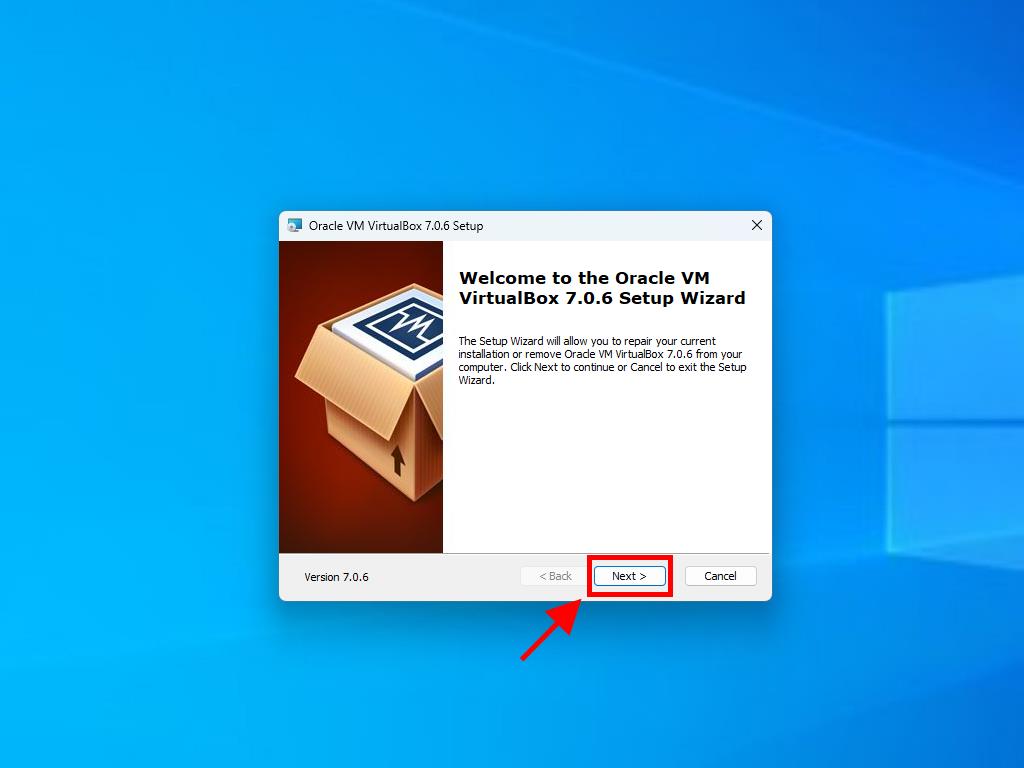
Tip: For a smoother installation process, opt out of the USB features in the setup menu.
To configure a new virtual machine in VirtualBox, follow these instructions:
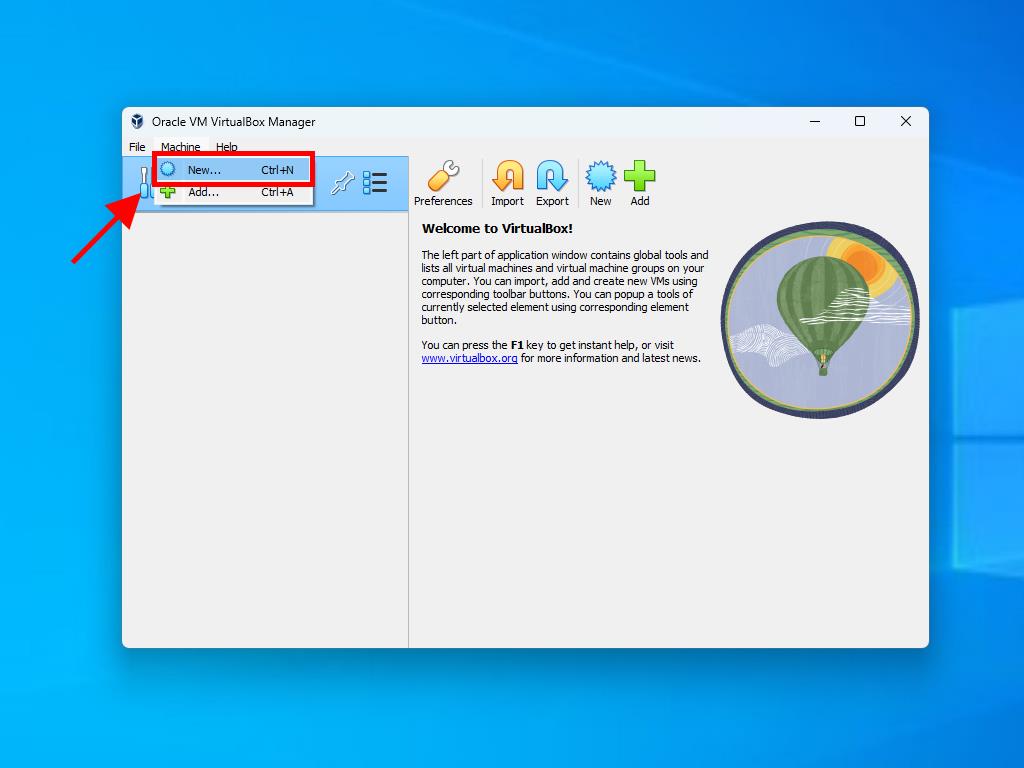
- Press the New button in the Machine menu.
- Name your new Virtual Machine, select the location for the Windows 8.1 .iso file, and then click Next.
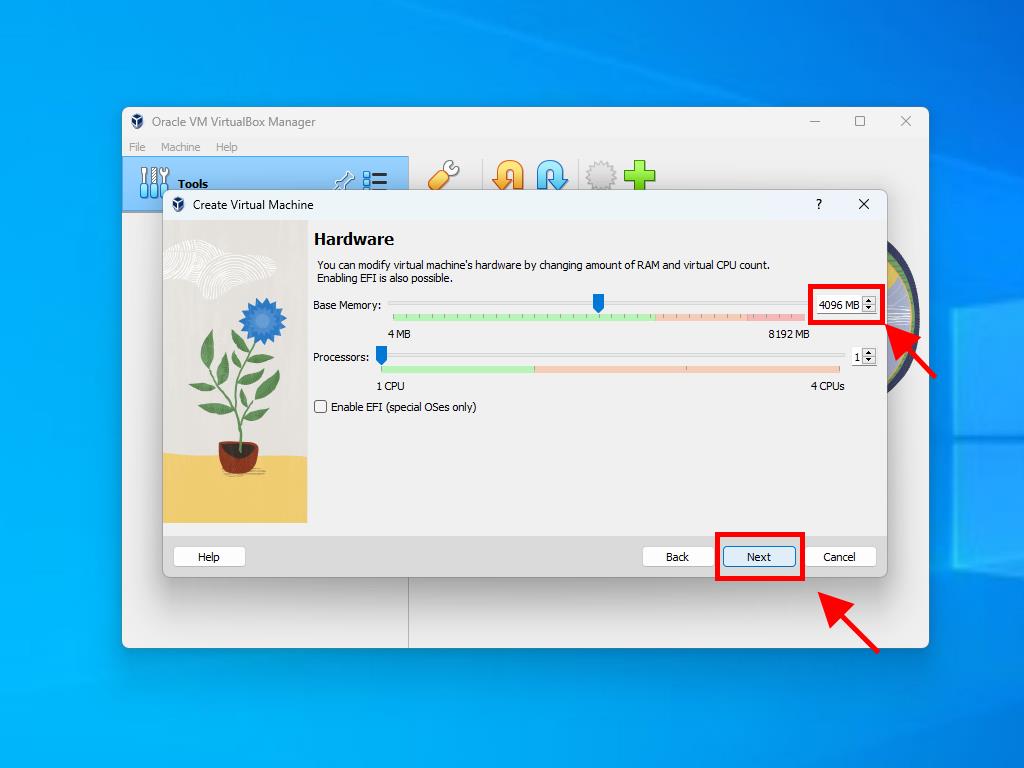
- Allocate at least 2 GB of RAM for your virtual machine and click Next.
- Choose to create a Virtual Hard Disk Now; a minimum of 40 GB is recommended for proper performance. Proceed by clicking Next.
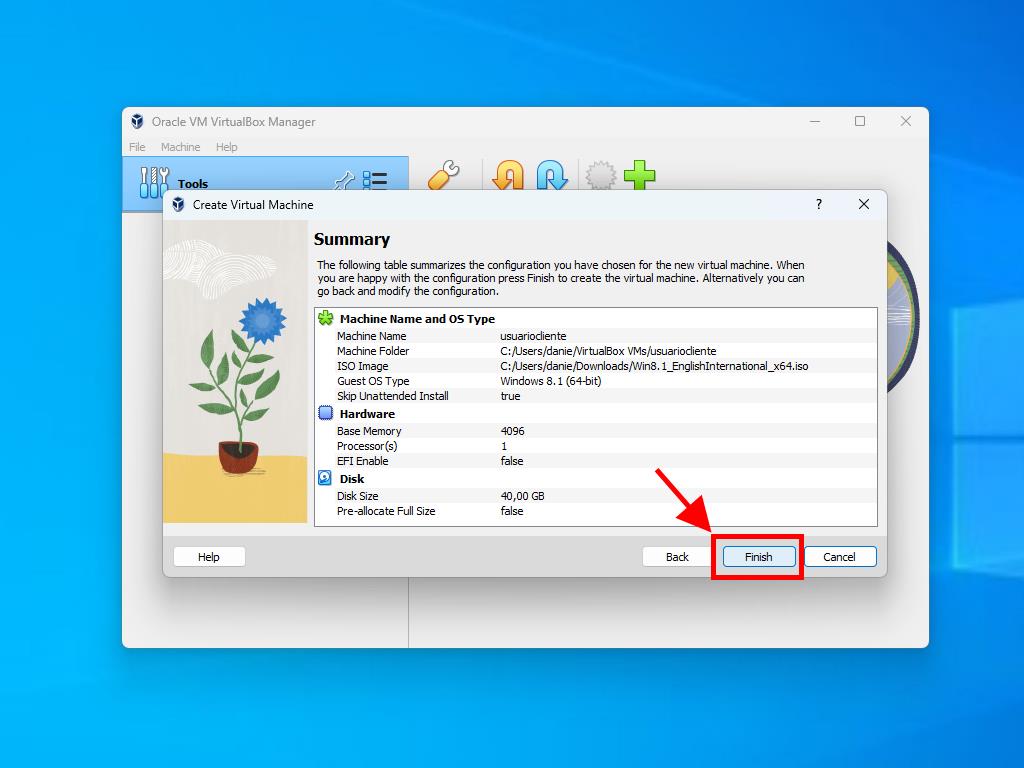
- In the Summary window that follows, confirm by clicking Finish.
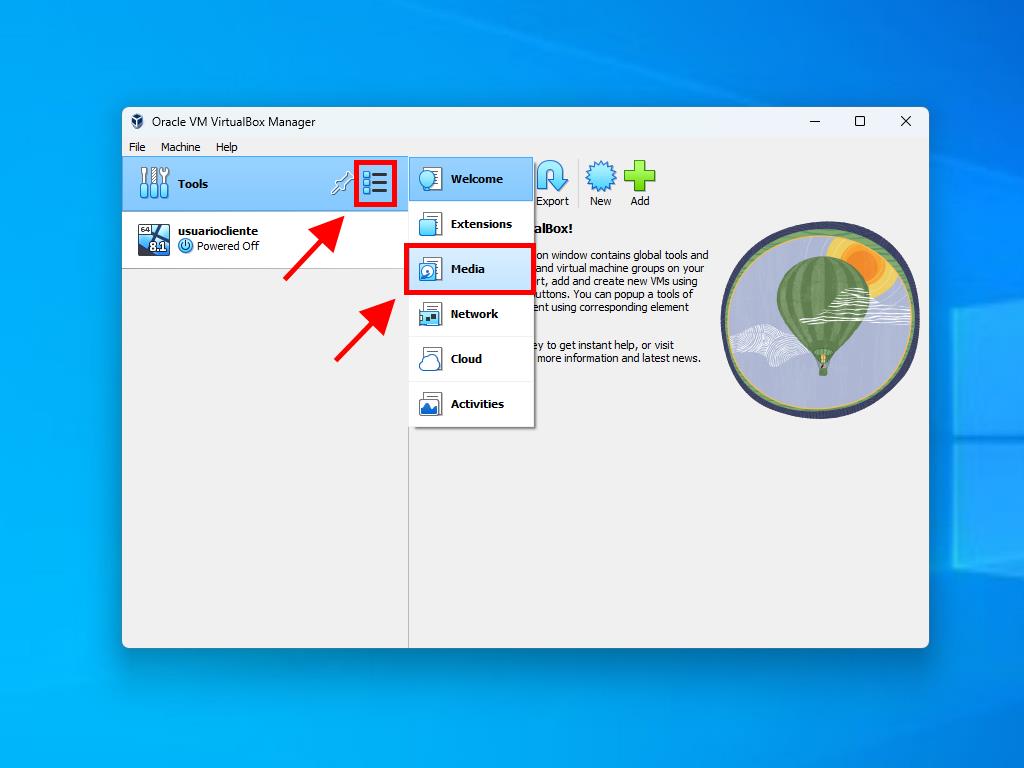
- Access the Windows 8.1 .iso file by clicking the three-dot icon adjacent to the Tools menu and selecting Media from the dropdown.
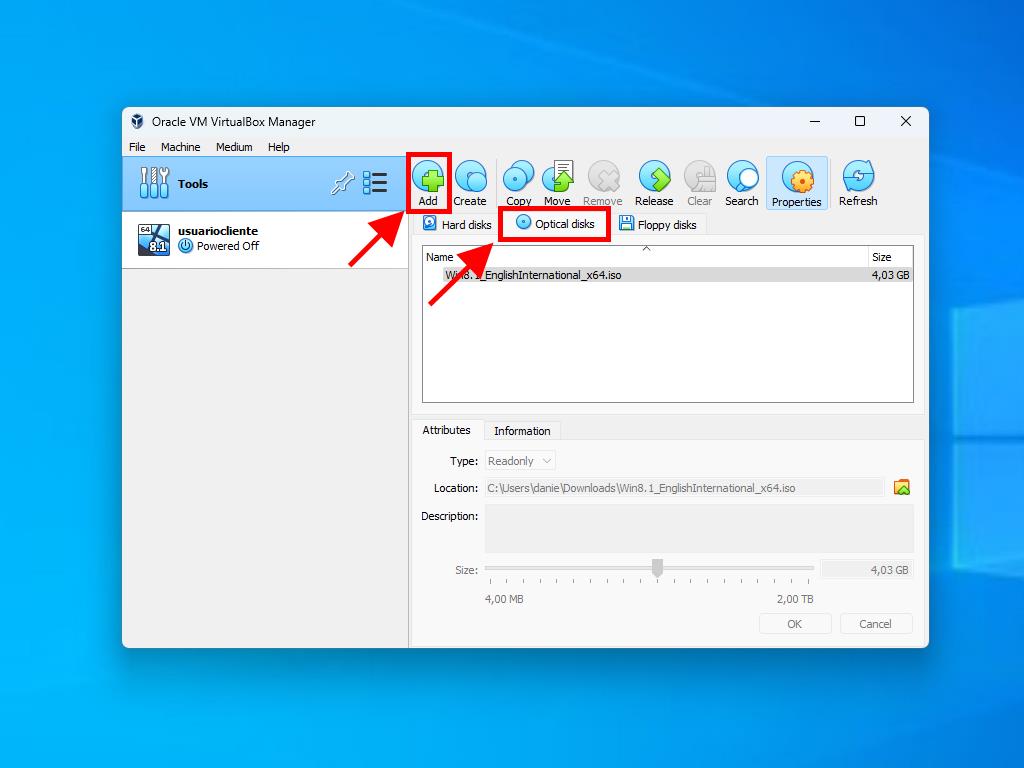
- Afterwards, proceed to the Optical Disks section and select Add. Choose the Windows 8.1 .iso file once again.
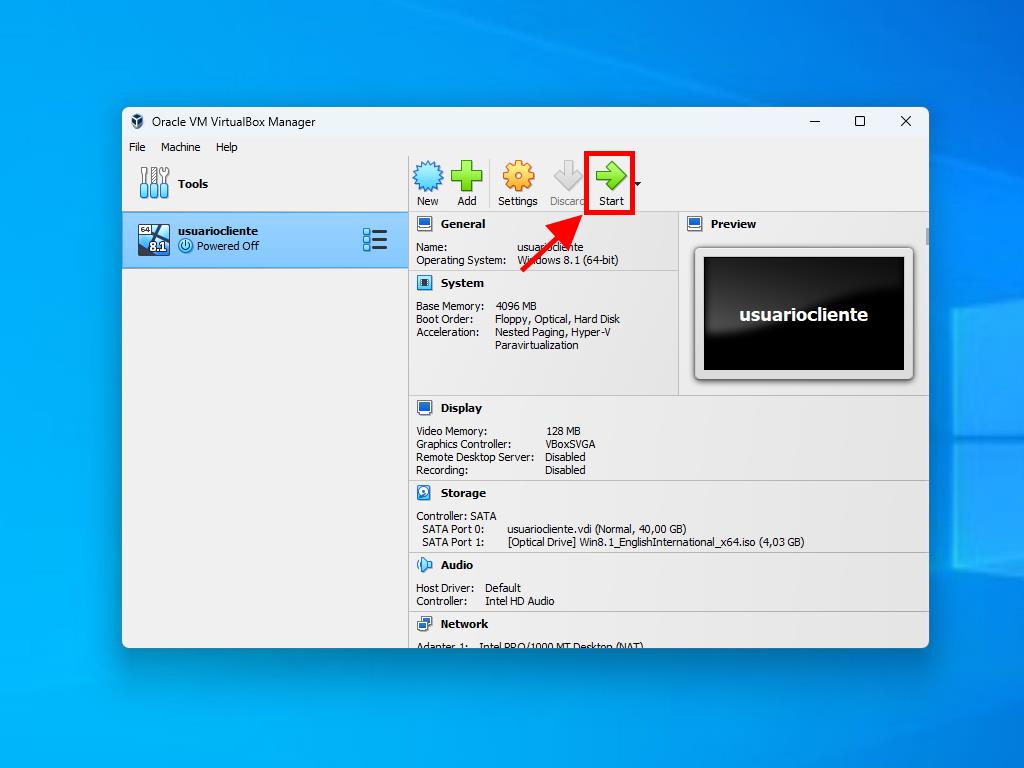
- Start the virtual machine by clicking Start.
- Following these steps will initiate the installation of Windows 8.1.
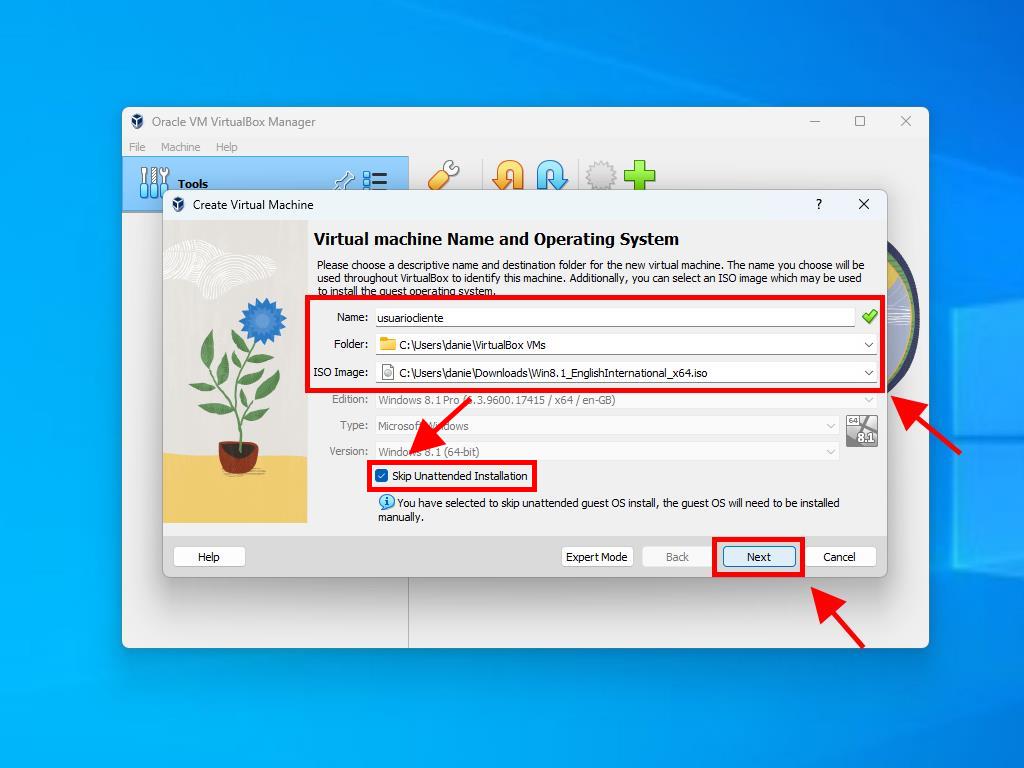
Note: Check the box for Skip Unattended Installations if available.

For additional guidance on Windows setup, please refer to the section: How to install Windows 8.1?.
 Sign In / Sign Up
 Orders
 Product Keys
 Downloads

 Go to United States of America - English (USD)