 Sign In / Sign Up
 Orders
 Product Keys
 Downloads

 Go to United States of America - English (USD)
How to Create a Bootable USB Drive for Windows 7 Installation
Begin by securing the Windows 7 installation file (.iso), then proceed to craft a bootable USB drive.
Important: Ensure your USB device boasts at least 4 GB of capacity.
To execute this task, utilize:
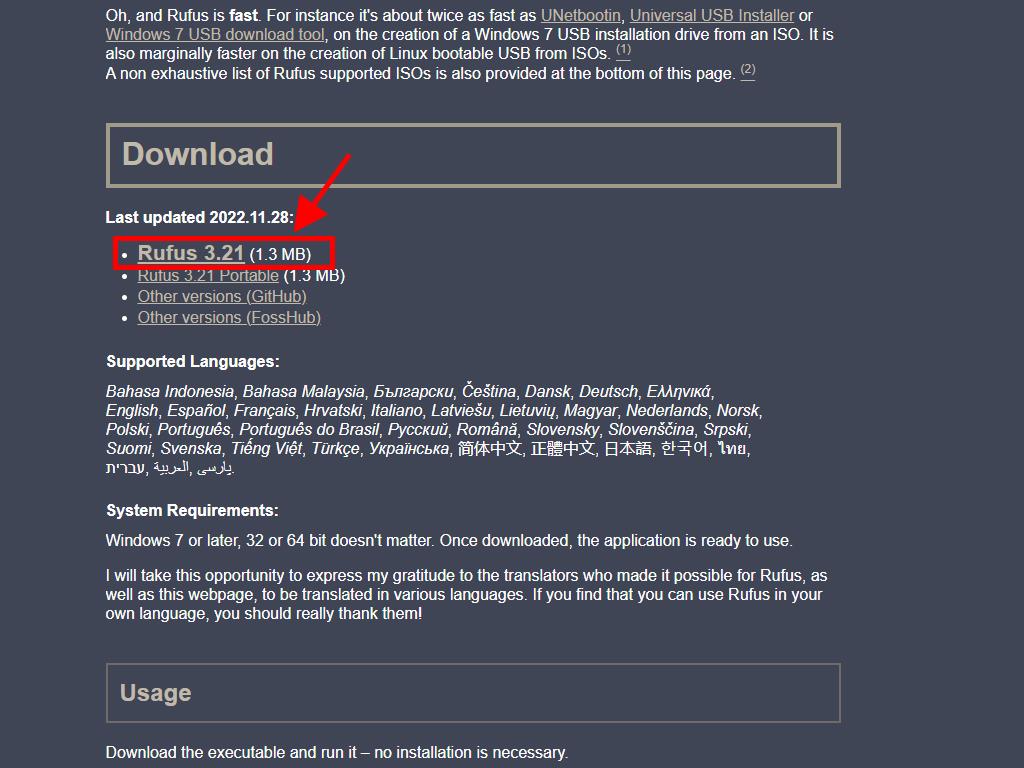
Rufus
- Grab your free copy here.
- Navigate below and snag the latest Rufus version under the Download tab.
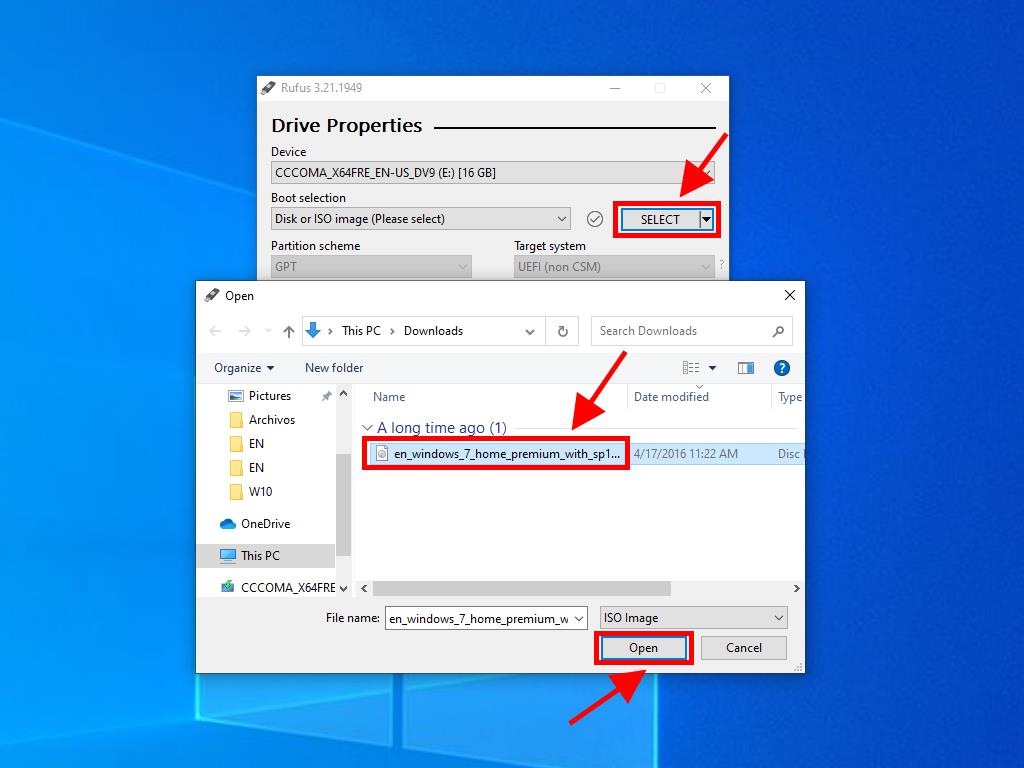
- Attach the USB and fire up the Rufus application.
- Select the Choose button and locate the Windows 7 .iso file you wish to utilize.
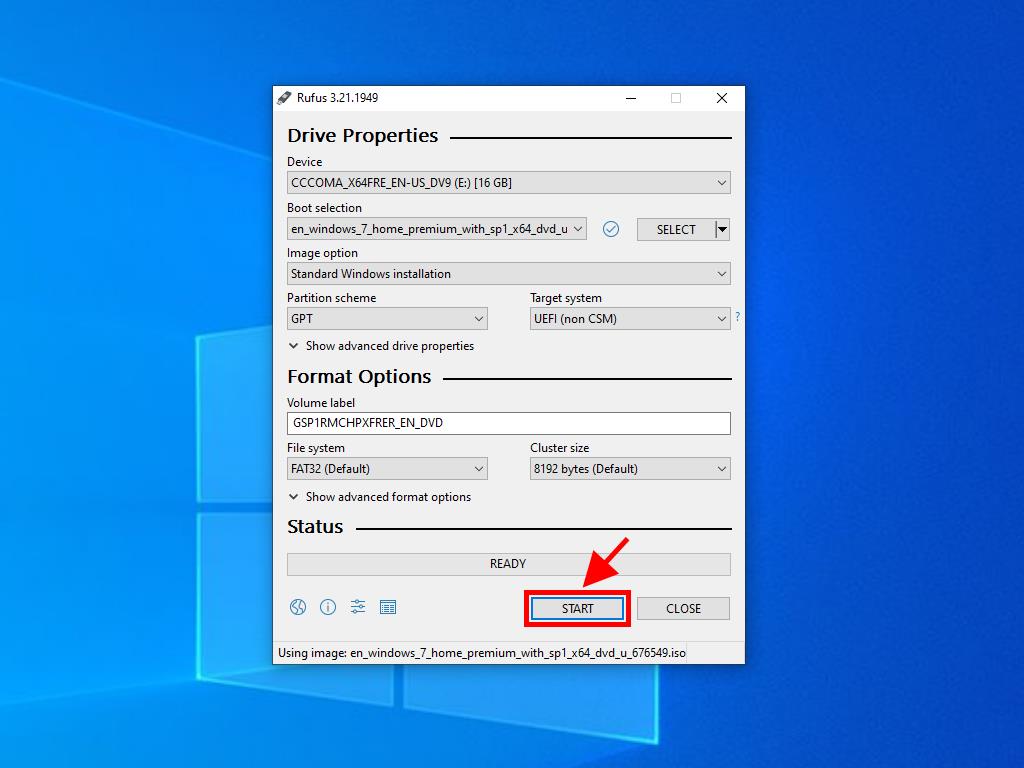
- Press Start, then await Rufus to finalize the bootable USB creation.
- Upon completion (progress bar at 100%), hit Close. Your USB is now ready for Windows 7 installation.
Heads-up: A dialog titled Customize Windows Installation will pop up. Choose Disable Data Collection and let Rufus proceed.
Note: Select the GPT partition scheme for PCs post-2020, and MBR for those pre-2020.
